Archive for February 2015
To create a USB stick follow these instructions:
- 1Insert a USB stick .
- 2Open the dash and search for Startup Disk Creator.
- 3Select the Startup Disk Creator to launch the app.

- 4Click 'Other' to choose the downloaded ISO file.
- 5Select the file and click 'Open'.

- 6Select the USB stick in the bottom box and click 'Make Startup Disk'.

- 7That’s it! When the process completes, you’ll be ready to restart your computer and boot from your usb.
Variety
Variety is an applet indicator that lets you create wallpaper slideshow from pictures stored at various location as well as from several different online sources such as Picasa and Flickr. Apart from setting the time interval for the slideshow, you can also apply various filters for blur or oil paint effect on the wallpapers. Since Variety sits in the top panel, you can use it for a quick change in the background image or deleting a wallpaper. To change the settings or configuration select Preference from the drop down:
You can see the different configuration options here. As advised before, select the option to start Variety at start up to enjoy the wallpaper slideshow painlessly.
Use the following commands to install Variety in Ubuntu:
sudo add-apt-repository ppa:peterlevi/ppa
sudo apt-get update
sudo apt-get install variety
Use the following command to remove Variety:
sudo apt-get remove variety
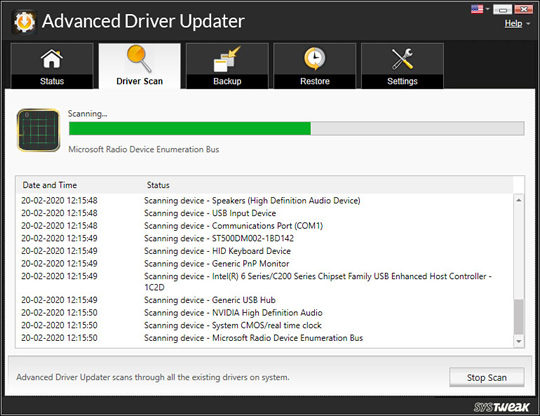
You'll have to update drivers in Windows when a hardware device doesn't install automatically, like after a Windows clean install.
Updating drivers is also a great troubleshooting step when the device is having some kind of problem or is generating an error like a Device Manager error code.
Updating Windows 8 drivers also isn't always a fix-it task. An updated driver may sometimes enable new features for the hardware, something I see on a regular basis with popular video cards and sound cards.
Regardless of why you're updating them, here's an easy-to-follow tutorial on how to update drivers in Windows 8. If even this isn't simple enough.
Difficulty: Easy
Time Required: It usually takes around 15 minutes to update a driver
Applies To: The driver update process is identical in all editions of Windows
This is your Solution
Review summary
Good points 
• Features a safe, extremely comprehensive driver database
• Makes it easy to download and install up-to-date drivers
• Can be scheduled to update drivers automatically
• Offers excellent backup-and-restore functionality
Bad points 
• Lacks customization options
verdict
Advanced Driver Updater is a highly effective system utility designed for users of all experience levels. Those looking for an easy way to keep system drivers up to date will appreciate the convenience that Advanced Driver Updater provides.

Images:


DESCRIPTION
INSTALLATION
1. Download the. Zip file and dump the firmware to the memory card.
2. Loaded in Recovery
3. Making wipes:
1) Wipe Data Factory Reset
2) Wipe cache partition
3) Mounts and storage -> format system
4) Advanced -> Wipe Dalvik Cache
5) Select Install / Install zip from SD
6) Choose. Zip firmware file and wait for the end of the process.
7) Boot the system.
gapps included – rooted – theme supported
Multilingual…
Notes: First boot takes long time please wait…
Many of us at some time wanted to sync Google calendar with his Linux operating system using Evolution-calendar but then he faces this problem :

Well, that problem will no more occur
This is what you should do:
- First go to evolution app
- Go to new calendar and from popup chose caldav method instead of Google
- In the url field use:
https://www.google.com/calendar/dav/YOURUSERNAME@gmail.com/events. - Use your full user name for both username & email. Then click on find calendars. Enter your password.
- Select the desired calendar & click apply. It will appear in evolution.
- Repeat above steps for other calendars.
DONE!
1/ go to terminal preferences

2/In preferences page go to shortcuts tab


3/ disable shortcuts

4/that's it you will have Ctrl+c working again


